Saturday, January 3, 2015

Learning to Read with "Sing Spell Read and Write!"

When I was a kid, I learned to read using the Sing Spell Read and Write curriculum by Sue Dickson. It's awesome, and covers WAY more than just reading/writing! I loved it, and always figured I'd use it with my kids. I bought the pre-K curriculum package, and would recommend buying their whole package if you're looking for a curriculum (if you buy nothing else, get the level 1 CD for all the phonics songs!) but there are plenty of free/cheap resources we found:

You can find tons of explanations and demos on youtube by typing in the curriculum name, but here are our favorite videos:

The Phonics Song: This is the alphabet with pronunciations instead of letter names. I started playing it when my daughter was a toddler, and she was trying to sound out words before she was 2! I love that there is a slide show with the letters as they're singing so kids can learn to associate the shapes with the sounds.

Here's another version, with the chart/placemat that comes with the curriculum pack (worth making or buying one of your own):

And here are 2 links of kids singing it, because it's adorable, and there is no better motivator than seeing other kids do it, too!

When they get more advanced, there is a song for the short vowels (which they've already learned in the alphabet song) :

And new long vowel sounds:

Once they've got the letter sounds, then they move on to 2-letter combinations, once again, using singing:

I did the above activity by writing the vowels on a magnetic white board, then swapping out magnet letters for the consonants.

It takes a while to get to the combination stage, but once they've got it, it's amazing to watch them take off! We used the BOB books after that to introduce really simple words, and she loves reading! (I bought the first set from Amazon, and they gave me the option to buy the Kindle version for .99 as well. The physical books were really important as she was learning to read, I think, but after getting through set 1, we used the Kindle Owner's Lending Library to borrow each set as we needed them. Yay for free readers!)

Anyway, I hope that's helpful! We really enjoy the songs, and I made homemade  charts, books, and coloring pages by using black and white clip art for each letter (print each letter/picture combination and put them in a dollar-store photo album!).

"Pre-School" Lists

Last Spring I scanned through tons of "what your child should know before starting Kindergarten" lists (and a few "before 1st grade" lists), and compiled a "master list" of topics that I would like to cover with Kaja in these pre-school years. This is NOT an exhaustive list, nor does any Kindergarten teacher expect their incoming students to know these things (honestly, this is more like a Kindergarten curriculum, with several more advanced elements, too)! I DO NOT expect her to become an expert on everything on this list, and when I wrote it, I anticipated it would take at LEAST two years to get through most of it. Some items are a piece of cake for her, and some are extremely ambitious and probably won't be learned until she's older (the difference between a verb, noun, and adjective, for instance), but I put it on there as a reminder to help me work it into our conversations if it comes up, and to give me a goal to work toward, since I know she will need to learn it eventually. Who knows? She has surprised us plenty in the past!

Disclaimer: I'm not an educator. While some of these items came from education sources, this is purely my personal goals for my own daughter. This is literally just cut-and-paste from my brainstorming, so sorry for the discombobulated mess! Some items include suggestions on how to work on that concept, and at the bottom is my (incomplete) "wish-list" of supplies to play and learn with.

English/Language Arts:
  • Rhyming words
  • Telling stories from pictures
  • Putting story pictures in order
  • makes predictions about what comes next in a story (and why)
  • Retelling and recalling story details
  • identifies setting, plot, character, conflict (where/when, what, who, why, how)
  • empathizing and talking about characters feelings and emotions
  • "story stones" (making up stories including certain elements)
  • Writes her own (full) name
  • Concept of sentences, simple punctuation (period, question mark, comma, quotation mark, etc.)
  • Title, author, illustrator, chapters, table of contents,
  • basic word types (noun, verb, adjective)... do madlibs together?
  • Fact vs. fiction
  • Capitalize 1st letter in sentence, and proper nouns.
  • Tracing and writing letters and numbers


Math/Numbers:
  • shapes (2D and 3D)
  • Tell Time
  • count to 30 (work in with months), 60 (work into minutes/hours), then 100
  • seasons
  • months of year?
  • days of the week (this method using vitamins in pill organizers makes it so easy!)
  • Yesterday, today, tomorrow, last week, other time words (work into vitamin lessons)
  • Right and left
  • sorting by size, color, shape, type, etc
  • more or less
  • measuring (length, width, height, weight, volume (liquid measurements), time, temp. etc)
  • Money!
  • Simple addition and subtraction
  • working with a number line
  • graphing
  • ordinal numbers (first, second, third)
  • simple fractions ("cut the cake in half")
  • skip counting (2's, 5's, 10's)?


Science:
  • Observations and hypotheses (prediction based on observation)
  • use magnifying glass to examine items carefully
  • 5 senses
  • weather
  • living vs. non-living (plants, animals, minerals, etc)
  • What living things need to survive
  • life cycles (like frogs and butterflies)
  • classifications (bird, fish, reptile, amphibian, insect, arachnid, mammal, etc)
  • plants: from seed (bean sprouts), grow a garden (from sprout to blossom/fruit), roots and root vegetables, different food sources (fruit, vegetable, grain, dairy, nuts/legumes, meat)
  • stars, planets and solar systems
  • Look at stars, talk about what they are, simple constellations, point out planets, etc.
  • waterways (definition of: wells, springs, streams, rivers, lakes/ponds, oceans), currents, etc.


Geography/History:
  • Understands different places have different climates, animals, cultures, languages, etc.
  • 7 continents (list and locate)
  • 4 oceans
  • north pole, south pole, equator
  • compass directions
  • understand the difference between “city, state, country, continent”
  • understands “Past, present, future” concepts, and the difference between stories and history
  • Use timelines to show progression of time (seed-plant, baby to adult, progress of day, then history, etc)
  • Talk about kings, presidents, governors, other authority figures


Life Skills:
  • ROUTINE!!!
  • Dress self
  • button and zipper fastening
  • tie shoes
  • set and clear table
  • help with cleaning tasks (sweeping, dusting, wiping)
  • put away books and toys (sorting)
  • early folding laundry skills (matching socks, folding towels, etc)
  • sort her own laundry???
  • Know her own birthday, address, phone number
  • Know when to use titles of respect (Mrs., Mr., Pastor, Doctor, etc)
  • help in kitchen (stirring, using the manual egg-beater, helping to pour/measure, use the food chopper or wavy chopper)


Gross Motor:
  • bounce and catch ball
  • skip
  • hop on one foot
  • climb ladders


Art and fine motor ideas:
  • scissor work
  • color blends (red+blue=purple, blue+yellow=green, etc)
  • pipe cleaner and cheerio threading
  • drawing shapes in different sizes
  • using shapes to make a picture (start by using pre-cut shapes to make pictures, a-la funny face, eventually working toward drawing in the shapes freehand)
  • stencils
  • mist plants with spray bottle to build hand strength
  • use an eye-dropper for coordination (fun for color mixing games! 2-in-1!)
  • tracing in clay, cutting clay
  • Recreating pictures, shapes, etc from looking at a model (no directions)
  • creative modeling materials (toothpicks and marshmallows/raisins, etc.)
  • Looking at and talking about different styles of art


Items/equipment ideas:
  • Magnifying glass
  • balance scale
  • misting spray bottle
  • eye dropper
  • plastic test tubes?
  • Small table/chairs
  • low cupboards for her dishes/silverware
  • Ideally, Kid-safe kitchen items in reach with a low workspace (hang a low shelf?) (wavy chopper, food chopper, manual egg-beater, plastic dishes/silverware, etc)
  • Full-length mirror to hang sideways near ground (for baby), or larger/multiple mirrors (fun for dancing!)
  • 5or7-compartmet organizer for laying out outfits for the week
  • clothing hamper(s) for K
  • trampoline (those small ones for exercising)
  • tumbling mats (IKEA!)
  • balance beam (again, IKEA!)
  • items to climb, hang, swing, and rock on
  • Hang a lower closet bar so she can reach her own clothes
  • Tension/closet rod and bags with hooks for puzzles and sets of small things
  • Chalkboard Paint! (magnetic?)
  • Or giant, glossy sheet metal that can be magnet board and dry-erase board (oil drip pan?)
  • The Crayola Dry Erase Activity Center is seriously the BEST thing ever! You can slide any 8.5x11 paper under the clear plastic and it becomes a dry-erase board! We use it for coloring, tracing, worksheets, mazes, you name it!
  • play money
  • letter stamps and stickers
  • counting manipulatives (pebbles, bottle caps, glass beads from the dollar store, etc)


Saturday, December 6, 2014

DIY Baby Wearing Coat Insert Tutorial!!!

I've seen some really cool baby-wearing coats online, and found some very clever ideas for sewing inserts for your own coat (including this very simple and clever one made from 2 fleece jackets, and this variation where the fleece zipper matched her coat zipper!), but none of them were quite what I wanted. It occurred to me that, instead of cannibalizing a fleece jacket, I could just as easily buy a zipper and some fleece at the fabric store, and then I could use whatever material I wanted. Once I realized that, things started to snowball. I anticipated wearing the baby while playing out in the snow with my 3-year-old, so I wanted something that would keep out the wind, so it had to have a stronger outer material, and a method of cinching up at the top and bottom to keep out the drafts.
After a great deal of thinking and reverse-engineering, this is what I came up with. I am NOT a seamstress. My sewing skills are intermediate, at best, and my machine is old and decrepit, so it's not very pretty or polished, but it does exactly what I want it to do, so I am pleased. Here is how I made it.

The collar can be folded down

Or gathered at the top to create a hood!


Here's what it looks like by itself

Okay, this isn't going to be a very thorough step-by-step tutorial, and I'm sorry about that, but I completely forgot to take pictures while I was sewing, and I'm not a seamstress myself, so you get to see pictures of the completed product, and some mock-ups using paper, with some very rough descriptions along the way (it's almost midnight, I'm trying to get this typed and posted before the baby wakes up for his next feeding, and I'm tired and not thinking very clearly, sorry).

Materials:
lining: fleece
Outer: I used rip-stop nylon because I had it already, but outdoor canvas or any other outerwear material you want is fine.
¼ inch elastic tape
round cord elastic
“Spring Stop Cord Locks”
zipper (most coats use YKK size 5, but do check your coat! If the zipper is YKK, look on the back of the zipper pull. There should be a little serial number. If there is a “5” in the number, you've got a size 5)

Step 1: Measure
Wear your baby and put on your coat. Measure your zipper from the bottom, to however far up you want the insert to zip (I didn't want it to zip up as high as my coat does, since the baby's head sits lower than mine, so I got a shorter zipper. For my coat, I needed a 22-inch one). Then measure the distance across your baby, from zipper to zipper at various points along the way (my coat had velcro every 5 inches, so I measured across at the bottom, then at every velcro up to the top). I also measured how high up from the bottom my baby's neck was, because I wanted to add elastic around the neck to keep out the wind.
*Be generous with the measurements, don't make them too tight, you want to allow extra room for baby to grow, extra layers, etc.
*about the zipper length: Because the outer edges are curved, your zipper will need to be slightly longer than the height you measured (which is a straight line). I recommend drawing your pattern first, and measuring the edges before purchasing a zipper.

Step 2: Trace
Take your measurements and plot them out on a large sheet of paper (wrapping paper, tissue paper, packing/butcher paper, whatever). I first measured the center (blue line), then marked my landmarks (top, bottom, and velcro's in-between) along that center line. Then I marked the points for my measurements, making sure to center them symmetrically across the line (red dots). Then I just kind of traced a curve, making sure it went through all the dots. I wanted a hood, so made the top curved, but you could just as easily make it a straight collar and eliminate a step. The top of my curve is about 8 inches above the top of my zipper. I also marked out where the elastic would go (green, wavy line), but you don't really need to do that on the pattern, I just did it for the sake of clarity.
Because I wanted to add drawstrings to the top and bottom, I added an extra inch or so on both ends (dotted line). I actually could have gotten away with much less than an inch, probably half-an-inch would be fine.

Step 3: Cut
I pinned the two fabrics together, right sides facing in, and pinned the paper on top of them and cut them both out at the same time. I added a seam allowance by simply cutting about a half-inch outside the lines the whole way around. Super precise, I know. ;)

Step 4: Sew the zipper!
Pin the zipper between the two pieces (still right-sides together) with the teeth pointing IN. Make sure that the right portions of the zipper are on the right sides so they will sip into your coat properly (it will seem backwards. Turn the whole thing right-side out after pinning if you have to to check). If you haven't sewn a zipper before, this tutorial gives a nice visual :
http://www.purlbee.com/2014/04/18/mollys-sketchbook-simple-lined-zipper-pouches/

Also, a zipper foot on your sewing machine helps!

Sew the zippers in up both sides, but leave that inch or so at the top and bottom open for the drawstring (unless you don't want a drawstring, in which case, just sew all the way up and down each side). Don't sew the top and bottom yet, you should basically have a tube right now.

Turn it right-side-out and top stitch the zippers to make a clean finish.

Step 5: Elastic!
Keeping the panel right-side-out, slide the end of your elastic tape between the pieces and pin it inside, by the zipper at the height you measured. Sew a tight zig-zag through all the layers to tack down that end (just the end). Leave the elastic long, you want it to hang out so you can grab it to pull. I just held the whole roll and didn't cut it until I had finished sewing it in.
To make a channel for the elastic, move the tape out of the way as much as possible and sew a straight line across the whole panel under the elastic.
Then, push the elastic as close as possible to the sewn edge, and very carefully sew another straight line above the elastic, making sure NOT to sew the elastic! This is the fun part.
When you get close to the other side, you will have to stop short to avoid sewing over the long end of the elastic that is poking out. When you have sewn as far as you dare, pull the elastic until the panel gathers as tightly as you want it, then pin it in place and zig-zag over that end to secure it.

I wish I had pictures of this process (sorry!), but here's the finished product, hopefully it gives you an idea of how that should go:
Gathered elastic
Elastic pulled straight so you can see the channel and the zig-zags on the ends


Step 6: finishing the top and bottom:
Turn the panel inside-out and sew across the top.If you're adding a drawstring, fold in and pin the edges on the sides above the zipper as if you're going to hem them, but don't sew. When you sew the top seam, it will catch the top of that fold and tack it down so the opening for your drawstring doesn't have rough edges poking out. I would add fray-check or some kind of liquid seam on those edges. I'm sure there's a better way to do this, but I don't know it. Will someone enlighten me?
Turn it right-side out again and top stitch the seam. Then sew another line underneath the top stitch to create a channel for your elastic cord.
*I made a nice, wide channel, which creates kind of a ruffled effect when the hood is gathered. If you want tighter gathers, make the channel more narrow and closer to the edge.
Once you've sewn your channel, if there is a gap on the side seams between the bottom of the channel and the top of the zipper, top-stitch that closed.
See how ruffled the edges look with the wide channel?

The bottom will be finished almost the same way, but WATCH OUT: When I turned it inside out to finish the bottom seam, I forgot to leave a gap to turn it right-side out again and had to re-do the whole thing. Don't do that. Learn from my mistake.
Turn the panel inside-out, and sew across the bottom leaving a few inches to turn it right-side out! (don't forget to fold in the unfinished edges on the sides where the drawstring opening is)
Turn it right side out, fold in the edges of the opening and top stitch across the whole bottom edge. Then sew another line above it to create the channel for your elastic cord.
Here's a closer shot of the "channel."

You are almost done!

Step 7:
tie one end of the elastic cord onto a safety pin and use that to work it through the channel. 
If you have a single slot cord lock, just thread the elastic through the lock, tie a good knot and do the same on the other side.
I got dual slot cord locks, so I've got an extra step to finish mine:
Slide the cord through one of the holes, then back through the other to create a loop. 
Then slip the end inside the channel and sew it down (I tied a knot and doubled it up to have more to sew over.
If you think ahead, you can tack this down as you're sewing your channel. Just tack one end down at the start, sew most of the channel, thread the cord through, and tack down the other end as you're finishing the channel to create a cleaner look. Just remember to thread the cord locks on BEFORE you tack down the ends...


Step 8: Zip it onto your coat and get going! :)

Tuesday, January 14, 2014

Felt Anatomy Set Patterns


Kaja has been on an anatomy kick lately, and I've been looking for some good hands-on ways to engage her interest. I've been seeing a lot of really cool felt anatomy sets on Pinterest, and I thought I'd make my own from random felt scraps laying around.

Ah, the digestive system. Her favorite part! She has to feed her "patient" once it's put together!

We still have a ways to go for the cardio/pulmonary system...

I couldn't find a pattern, so I made my own. I guess you could just trace an image from an anatomy book, but it's hard to find one good resource for that (and if you use multiple images, you have to scale them), so I'm posting my pattern, in case anyone else wants to try! The images are at the bottom of this page.

Here are the awesome things that inspired my project:

This was the first one I found, and I love how detailed the organs are!

Here is the printed felt set that we had when I was a kid.

This very cool person made an anatomy DOLL with removable organs. She even published a free pattern! How cool is that?! I appreciated her suggestion to start with smallest/most detailed part and scale and size everything else to fit. That made my project much more manageable!

And here are some other clever ideas that I may have to try soon:

Life-sized felt organs that will "stick" to your clothes,

this anatomy apron,  or this version, or make your own!

As an added bonus, I sized the organs to fit over a 2-page body diagram in one of Kaja's favorite lift-the-flap body books. So if you're looking for an educational book to go with the set, I'd recommend Usborne's "See Inside Your Body." 

Bones: Skull, spine/pelvis, ribs, collarbones, humerus (2), ulna/radius (2), femur(2), tibia/fibia(2).
Digestive: esophagus, stomach, small intestine, large intestine
Cardiopulmonary: trachea, lungs (2), heart
Waste/other: liver, kidneys(2), bladder, pancreas (with gallbladder attached), spleen, and Brain!

Here are the patterns. Click on the image to view and download. Each one is sized for an 8.5x11" sheet of paper. When you go to print the image, just select the "fill entire paper"option for scale in the print menu.
For the body silhouette, I assembled the skeleton on a large piece of felt and used a piece of chalk to trace an outline around it. Pretty simple, really, and the chalk just rubs right off! :) I also used a sharpie to detail a few of the organs, shown on the pattern with dotted lines (small intestine and heart). 


Skeleton

Cardio-pulmonary

Internal organs

Skull/brain

Wednesday, October 23, 2013

An Adventure on Every Page!

Kaja's imagination is most active in the morning after breakfast. I always feel a little bit like a lazy mom, letting her play so long by herself, but I love to just sit with my coffee and watch her go! She's off in her own little world having "adventures" and the things she says and does are simply delightful!

This morning, as she does most mornings, she put on her favorite pair of shoes (that are still too big for her, so we can't wear them out yet) and announced "I'm going on an adventure now!"
Do you want to know where today's adventure is taking us? "To the LIBRARY!" Kaja set up an imaginary library by her bookshelves and is going back and forth, collecting a stack of books, "taking them home" to read them all out loud, then returning for another stack (we're still working on returning the books themselves to the library). She has most of her books memorized, and the few she doesn't know yet, she just wings it from the pictures, and that, too, is quite a show! I just love that her idea of an adventure is going to a place where she can read as much as she wants. She is currently working on book #19. And now she's pulled out another book with lots of words, and is calling me over to read with her. Warms my heart!


Monday, October 21, 2013

Who's Teaching Who?

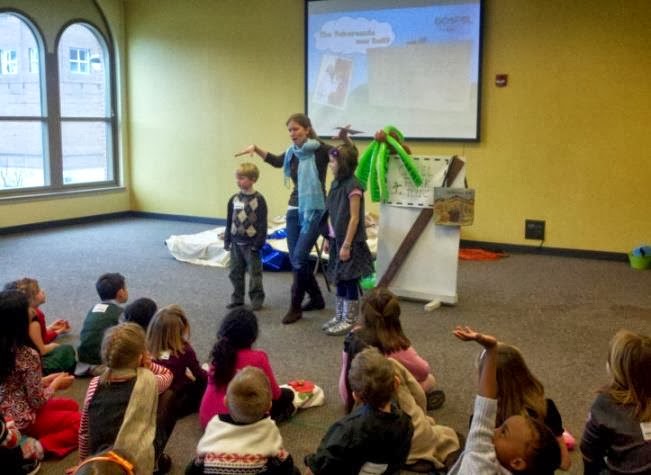
I get to teach the Kindergarten-2nd grade sunday school class at my church once or twice a month. I love getting to spend time with the kids, and I've always loved teaching in general, but the thing I find most humbling is that, even though my audience is 5-7 year-olds, and the stories are the same ones I've heard since infancy, I am still learning and benefitting from the same truths that I am teaching to the children. The craziest part is that I usually don't realize how much I needed to hear that lesson myself until Sunday morning, as the words are coming out of my mouth and the Holy Spirit is pricking my heart and saying "listen!" It makes me marvel and rejoice at how timeless the truths of God are. It is simple enough for a child to understand, yet deep and complex and meaningful enough that we will never be able to plumb the depths of it's wisdom.

This week I taught the story of Jonah, and boy was I convicted! I felt like such a hypocrite, telling these things to the class when I myself hadn't been thinking about or following these words for much of my week. I'm so thankful to God that He never stops teaching me, and always finds creative ways to do it!

Here are a few of the lessons we all learned yesterday:

1. God wants us to marvel at His creation. And He wants us to remember that it all points back to Him. Anytime we admire stunning beauty, magnificent power, awe-inspiring magnitude, perfect order, mind-bending creativity, heart-warming goodness, or anything else that makes us smile or think "wow!" that it all comes from HIM, and is just a dim reflection, a tiny preview of His beauty, His power, His magnitude, His order, His creativity and His goodness.

2. God made the world, and He called it good, and he cares for everything He has made, but He cares most about people. He cares about even the WORST people. Jonah was angry at God for allowing a shade-giving plant to die, but the thought of an entire city being destroyed in a fiery explosion didn't bother him at all. Isn't that the same for me? Don't I so easily get frustrated when I lose something that provides me with comfort or makes my life easier? If I care so much about these things, then the least I could do is care for people more--even the hard-to-love people that drive me crazy. If God cared about the people of Nineveh, who were sworn enemies of God and His people, the same people who attacked and enslaved the Israelites, then I can show compassion on those around me, no matter how frustrated with them I feel.

3. Absolutely nothing happens outside the sovereign will of God. There are some things that He actively ordains to happen, and some things that He simply allows to happen (that's where our free will comes in), but if He really doesn't want something to happen, it simply cannot happen. God actively sent Jonah to Nineveh, and when Jonah tried to refuse, he was stopped in the most remarkable supernatural ways. Not only was there a storm that stopped as soon as he was tossed overboard, but he was somehow preserved alive in the belly of a giant fish for days before being vomited back onto dry land, of all things. I mean, seriously? There's no doubt in Jonah's mind how this all happened, and you'd better believe that the next time God told him to go, he went!

4. It is possible to obey God's commands with a bad attitude, but the only person suffering is you.  (see chapter 4) I really needed an attitude check last week, and this was a pretty good kick-in-the-pants reminder!

So what about you? What and how has God been teaching you these days? :)


Friday, October 18, 2013

Reviewing my Reflections from the 'Refuel' Retreat. Or just: "Remember."

Gordon and I have the privilege of being "adult mentors" for Crossroads, our church's university ministry. We're still trying to wrap our heads around the fact that we are passing off as adults, much less mentors, but that's not what this post is about. Every year the group has a weekend Fall retreat in a beautiful rural area by a lake in Michigan. There's always great teaching, worship, bonding, new friendships, hilarious skits, beautiful scenery, and generally a very spiritually refreshing and encouraging time (hence, the title "Refuel").

The last time we attended the retreat (2 years ago), we took our then 5-month-old colicky daughter, and it was a nightmare. She didn't sleep well in her own bed, and the new environment had her freaked out like nobody's business. She screamed the whole 3.5 hour car ride up there, refused to sleep, and would cry unless I held her (and I had to be standing and rocking/bouncing, too. No sitting allowed). I spent the entire weekend holding a fussy baby, spending both nights in the glider rocking chair that Divine Providence placed in the living room of the house we were staying. Then she screamed all the way home, too. Not a refreshing time.

This year we decided NOT to take children! Kaja stayed with her grandparents, and the little guy we're hosting through Safe Families stayed with another host family for the weekend (they had hosted him before and were so excited to see this sweet baby again!). Poor Gordon had to work, so I was on my own for the Retreat. It was weird not having my family there, and I went through a little withdrawal, but after I got over the shakes, I determined to make the most of my time.

The speaker for the weekend was Peter Frey, a Crossorads alum. I was thinking of adjectives to describe his teaching, and I came up with "passionate" and "biblical." Then I looked at his website and realized I wasn't the only one who thought that (it's so true)! He had excellent things to say, and it was an incredible blessing not just to hear him teach, but also to reconnect a little bit with his wife, Mary, who is pretty much awesome in every way (we were in the same small group once upon a time)!

The theme for the weekend was "Hearing God's Voice." In the first session, Peter reflected on the way God seems so easy to hear and focus on when we're at a retreat, away from the stress and distractions, out enjoying creation far from the hustle and bustle and noise of our daily lives. He said it wasn't that God was speaking louder in those moments, but that we were actually taking the time to listen. One of the overarching points for the weekend was that God never stops speaking to us.

There was a significant amount of free time where I had the opportunity to ponder what we had heard. I found my mind wandering to the last time I was here at the retreat, struggling with the burden of a colicky infant. I began to reflect on how much things had changed in the last two years. I thought about how far we had come, how miraculous it was that we all survived, but most of all, I remembered the way God spoke to me in those times. It was then, in the darkest, loneliest moments, when I didn't think I could physically make it another hour, when I was at the end of my rope and feeling more desperate than I had ever felt before, that God ministered to me in the most profound ways. Help is most appreciated by those who are most in need. It was in the dark solitude of the night watches that He reassured me "I will never leave you, nor forsake you" (Joshua 1:5); "The Lord who watches over you... will neither slumber nor sleep" (Ps. 121); "The Lord is my light and my salvation" (Ps. 27). It was when my strength was ready to give way, when I was exhausted and shaking from fatigue that I remembered it was "the Everlasting God, Creator of the ends of the earth" who "gives strength to the weary and increases the power of the weak" (Isaiah 40).  It was then I was able to say "my flesh and my heart may fail, but God is the strength of my heart and my portion forever" (Ps. 73).

Once the door was opened, memories flooded back to me. Memories of all the times I really felt like I heard God's voice. As I thought back over the years, over the trials, the frustrations, the triumphs, the blessings, the highs and lows and every moment that I had found myself standing in awe of God, I realized something. Just like Peter had said, God never stops speaking those things. It seems so obvious, so simple, but GOD. NEVER. CHANGES.

So think back. Think about all the times you've been truly moved by God. Think about the comfort you've received when you were hurting. Think about the times you said "it would take a miracle to pull this off!" and a miracle happened. Think about the days you were so humbled by the tremendous grace He showed. Think about the times you lost yourself in the marvelous beauty of His creation. Every time in your life that His power made you tremble, His goodness made you dance for joy, His forgiveness set you free, His people became your family, His faithfulness made you want to declare it to the world--all of the truly awe-inspiring moments where you realized you had truly seen God.

And now remember that He "is the same, yesterday, today, and forever." (Heb. 13) God says "I the Lord do not change" (Malachi 3:6). He is all of those things, all the time. He is all of those things right now. Right. Now.

And yet today, only 5 days out from the retreat, I find myself already running on empty. I came back to real life, and it hit hard. Both kids came home with nasty viruses (different ones at that, so I get to worry about them giving it to the other!), Gordon was at a conference in Seattle, and I was confronted with the very worst of myself. Anxiously worrying about the children, growing bitter at the sleepless nights bouncing from one sick bed to another, patience wearing thin and temper flaring as I struggled to meet the needs of my tired, fussy little ones. This afternoon I threw up my hands and said "Everything I got out of the retreat is already gone!" And that's when I realized (once again) what an idiot I was. Because the truth I got out of the retreat was that it doesn't matter where you are right now, because God never changes. He is always at His best and His greatest, whether we realize it or not. 

So my goal for tonight, and tomorrow, and next week, is just one thing: to remember. Not even to remember one specific thing, just to remember God. Anything about God. Because I know that all of it is always true. "The Lord is righteous in all His ways, and faithful in all he does." (Ps. 145) "in Him there is no darkness." (1 John 1)

God is good all the time, and all the time, God is good.

He Giveth More Grace (by Annie J. Flint)

  1. He giveth more grace as our burdens grow greater,
    He sendeth more strength as our labors increase;
    To added afflictions He addeth His mercy,
    To multiplied trials He multiplies peace.
  2. When we have exhausted our store of endurance,
    When our strength has failed ere the day is half done,
    When we reach the end of our hoarded resources
    Our Father’s full giving is only begun.
  3. Fear not that thy need shall exceed His provision,
    Our God ever yearns His resources to share;
    Lean hard on the arm everlasting, availing;
    The Father both thee and thy load will upbear.
  4. His love has no limits, His grace has no measure,
    His power no boundary known unto men;
    For out of His infinite riches in Jesus
    He giveth, and giveth, and giveth again.

Great is Thy Faithfulness (Thomas O. Chisholm)

Great is thy faithfulness, O God my Father;
there is no shadow of turning with thee;
thou changest not, thy compassions, they fail not;
as thou hast been thou forever will be.
Refrain:
Great is thy faithfulness! Great is thy faithfulness!
Morning by morning new mercies I see;
all I have needed thy hand hath provided;
great is thy faithfulness, Lord, unto me!


Summer and winter and springtime and harvest,
sun, moon and stars in their courses above
join with all nature in manifold witness
to thy great faithfulness, mercy and love. Refrain

Pardon for sin and a peace that endureth
thy own dear presence to cheer and to guide;
strength for today and bright hope for tomorrow,
blessings all mine, with ten thousand beside! Refrain


Nebulizer treatments for everyone!!!
These kids are real troopers, and I'm so glad they're on the mend!
Praise God for modern medicine!